Introduction
Recently, a project had the need for the new Bluetooth audio standard Auracast. I also needed the chip to be backwards compatible with Bluetooth Classic audio and Bluetooth LE audio. Qualcomm provides the bulk of solutions for this kind of project, but their support is limited for smaller OEMs. I knew I needed to find a module vendor. This lead me to the good company IOT747. Their newest audio module, the IDC777, provided the perfect mix of quality support and product reliability.
This also serves as a way to briefly introduce the Wavecake serial library. The Wavecake serial library can interact with any serial device. Feel free to stretch this example to fit with any other serial devices scattered around your desk.
In this blog, I'm going to document the journey of getting started with the IDC777. In the end, we will connect to the IDC777 and read the following key pieces of data.
- Status
- Configuration
I will be using the following equipment, resources, and terminology
- IDC777KIT - The development board for the IDC777. It supports analog and digital audio out, and has all of the buttons you need for play/pause/skip.
- Wavecake - A web-based javascript IDE that supports serial commands.
- IDC777 Command Manual - List of the UART commands used by the IDC777 agent.
- IDC777 DISKIT Schematics - Schematics for the official IDC777 development board
IOT747
Links to the items IDC777 DISKIT and module for sale on Digikey can be found here.
Before we start: Wavecake
This post will use Wavecake to send serial messages to the IDC777. It's a simple IDE that makes it easy to run the write scripts that use serial commands. It's in a free Beta release. The links below don't require a sign-up. I'm actively seeking feedback. Please feel free to give it a shot and pass along your two cents!
Connect and Disconnect
Before we start reading from the device, we need design our script to connect and disconnect from the device. Make sure the IDC777 DISKIT is plugged into your computer and visible as a COM port.
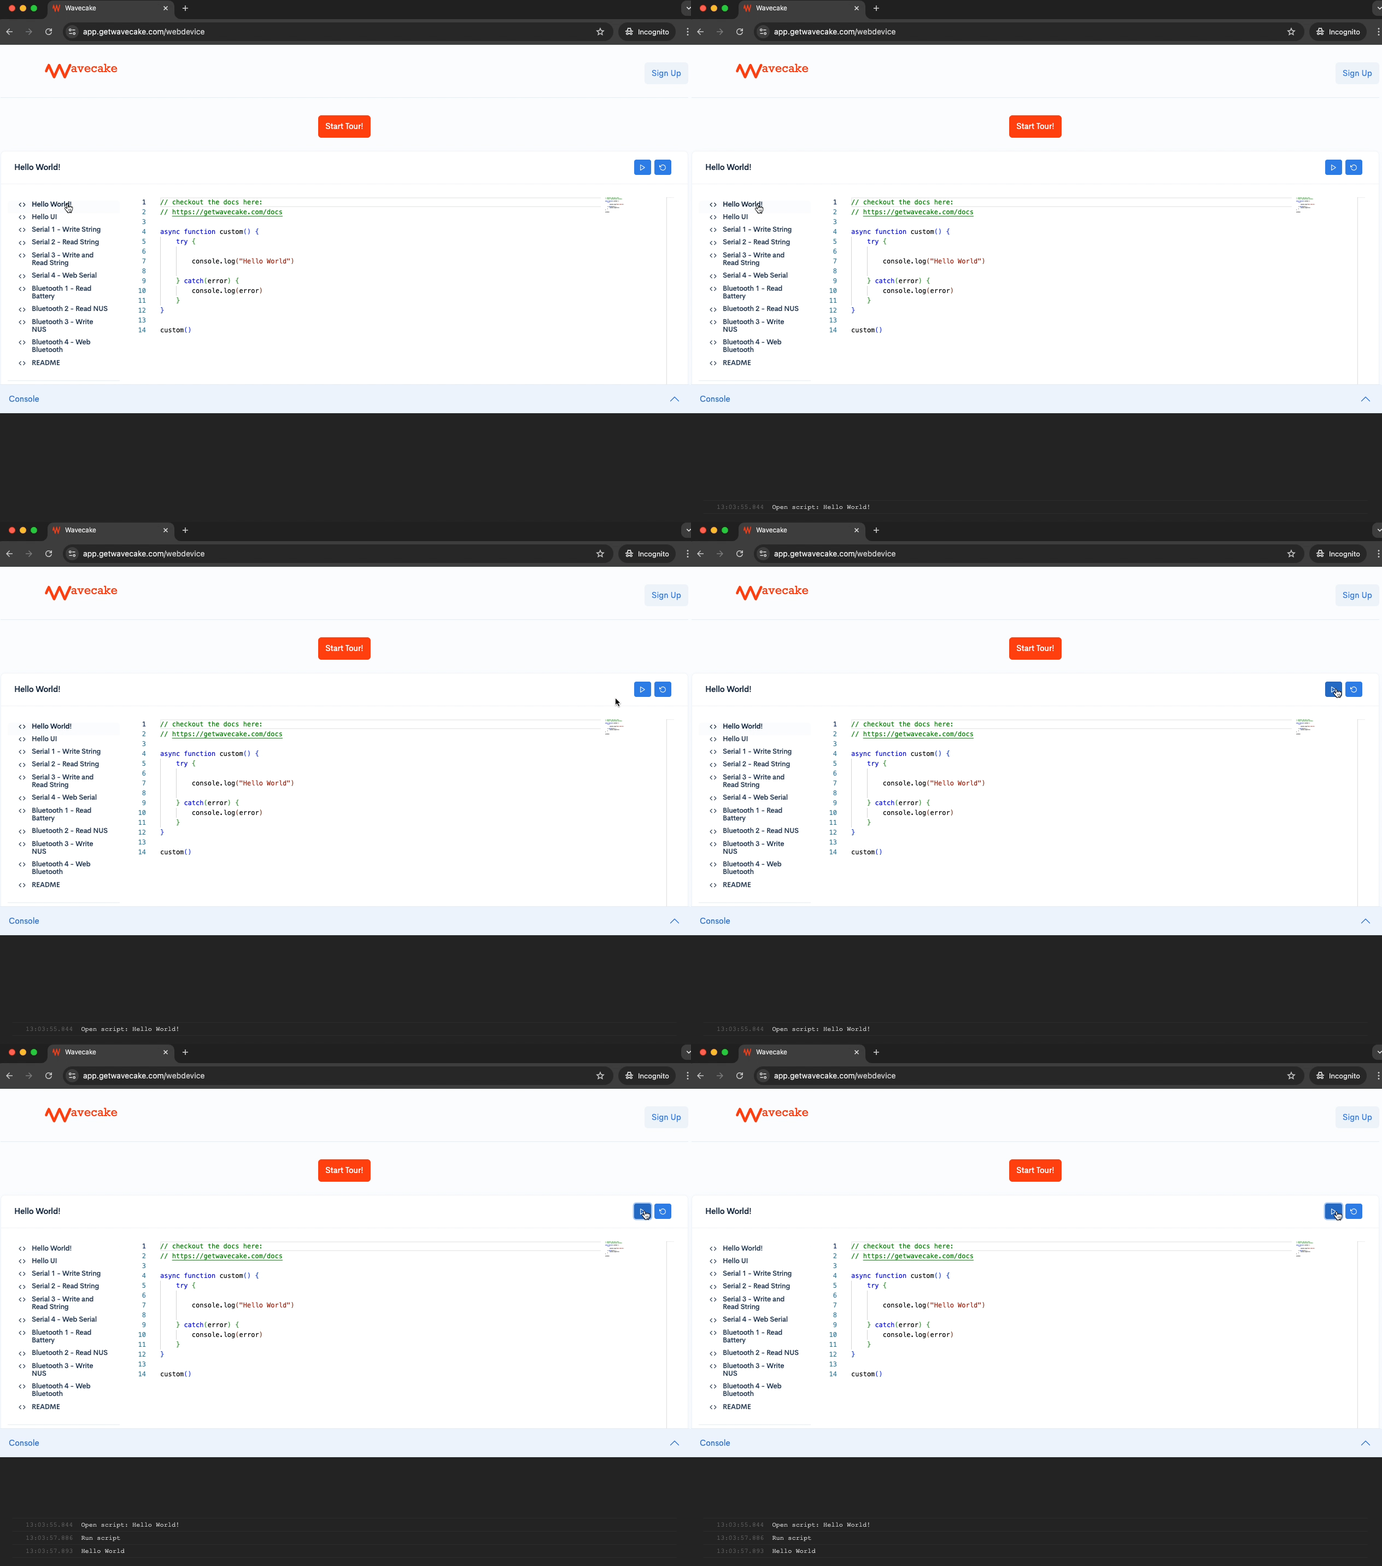
When you open the link to Wavecake, you should see a Hello World script. Click the small triangle to run the example. The console.log output will display in the Console window.

We'll be editing this script to communicate with the IDC777.
To connect and disconnect from the IDC777, add the following code.
await wavecake.serial.connect(9600)
await wavecake.serial.disconnectIot777()
console.log("Connect and disconnect success")
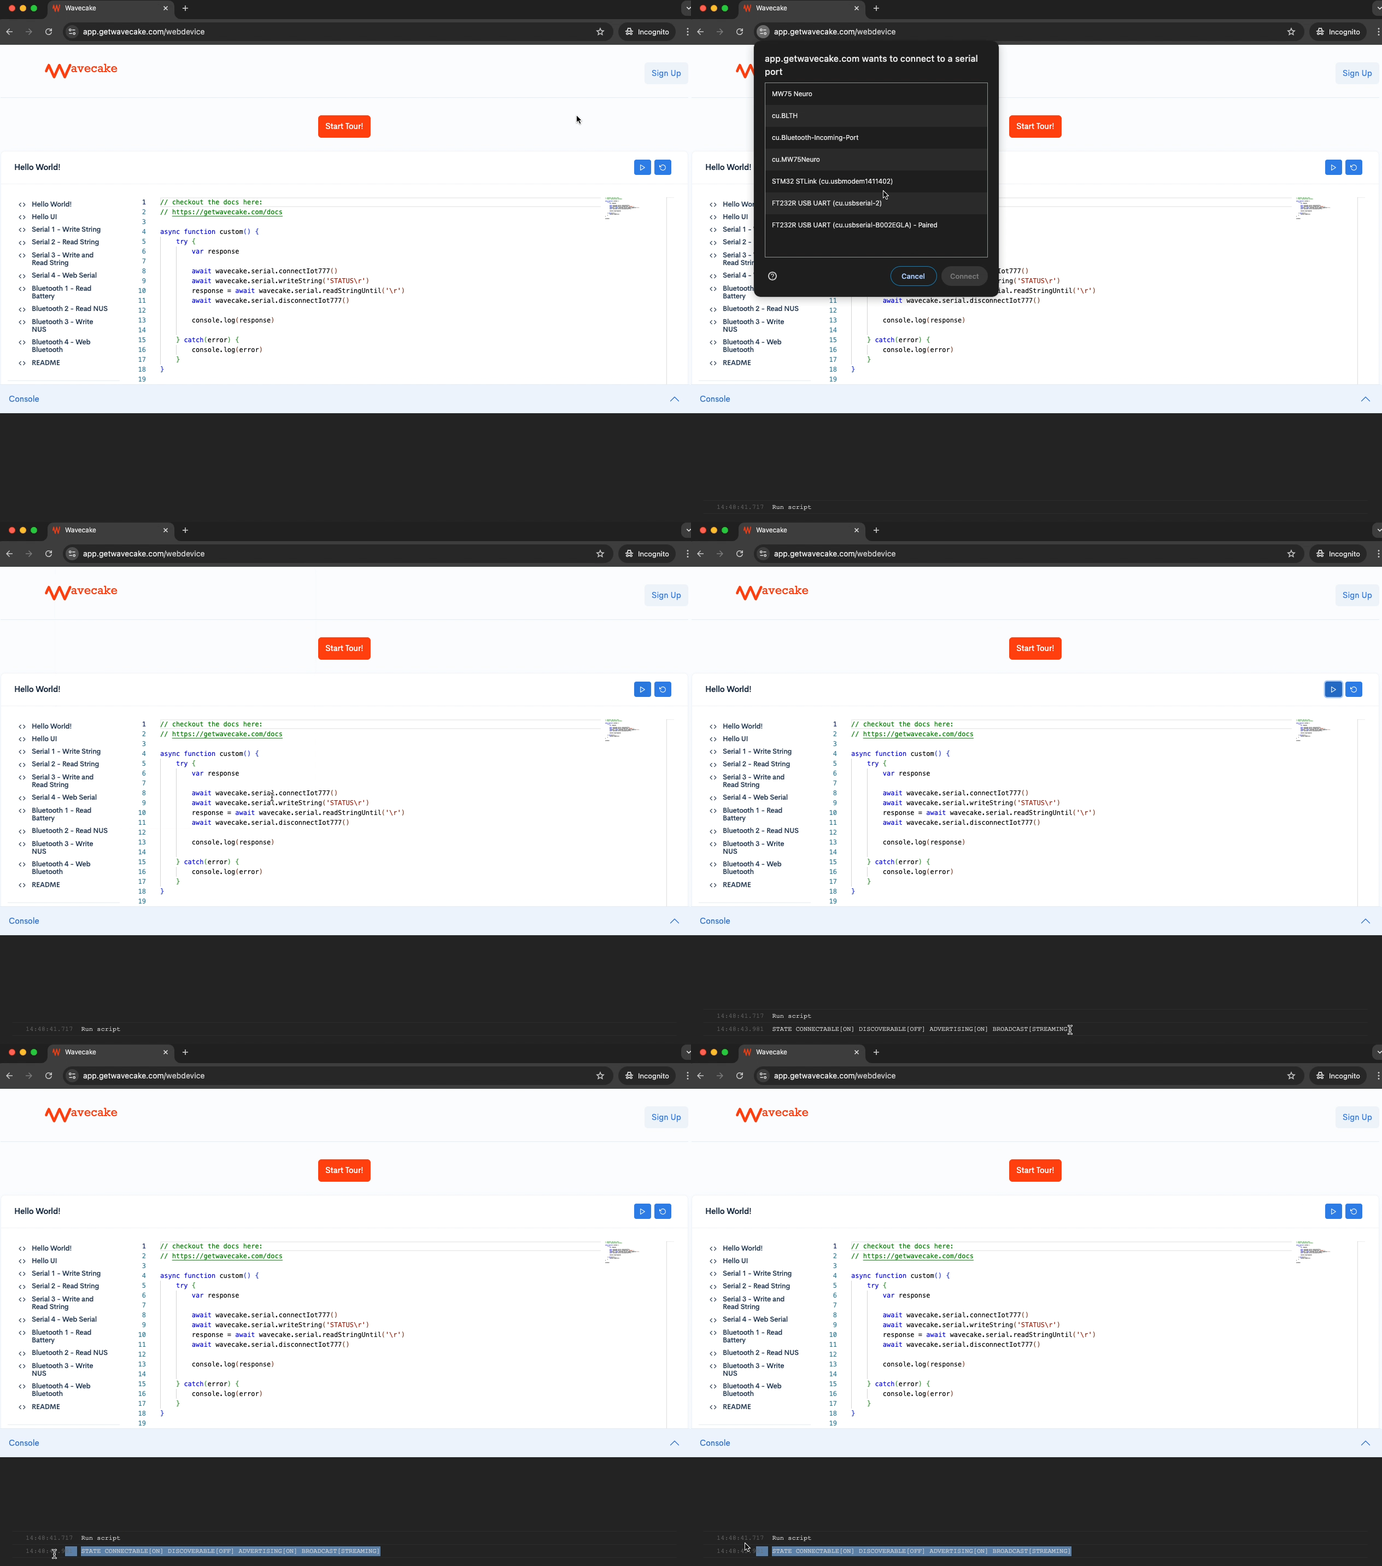
Execute the script and select the IDC777 COM port from the list of available devices. If the log prints to the console, the routine has been successful.

Well done! Let's read some data.
Reading Status
IOT747 recommends getting started by sending the STATUS command and reading the returned value. Here's an explanation from the command manual.

Notice, the protocol for reading status uses a command and response format. Also, worth noting, strings make up the base of the protocol. The protocol relies on carriage returns ('\r') for termination.
In the example of the status command, first, the software needs to send the string "STATUS\r". The device then returns the string "STATE CONNECTABLE DISCOVERABLE ADVERTISING\r". The device finally sends a second string "OK\r".
Let's write some code to walk through this sequence for the IDC777 status.
var response

await wavecake.serial.connect(9600)
await wavecake.serial.writeString('STATUS\r')
response = await wavecake.serial.readStringUntil('\r')
await wavecake.serial.disconnect()

console.log(response)
This will retrieve the important information contained in the first line of the status response. Then the logs display the value in the console.

We did it! We've connected and read the status of the IDC777.
Status Display
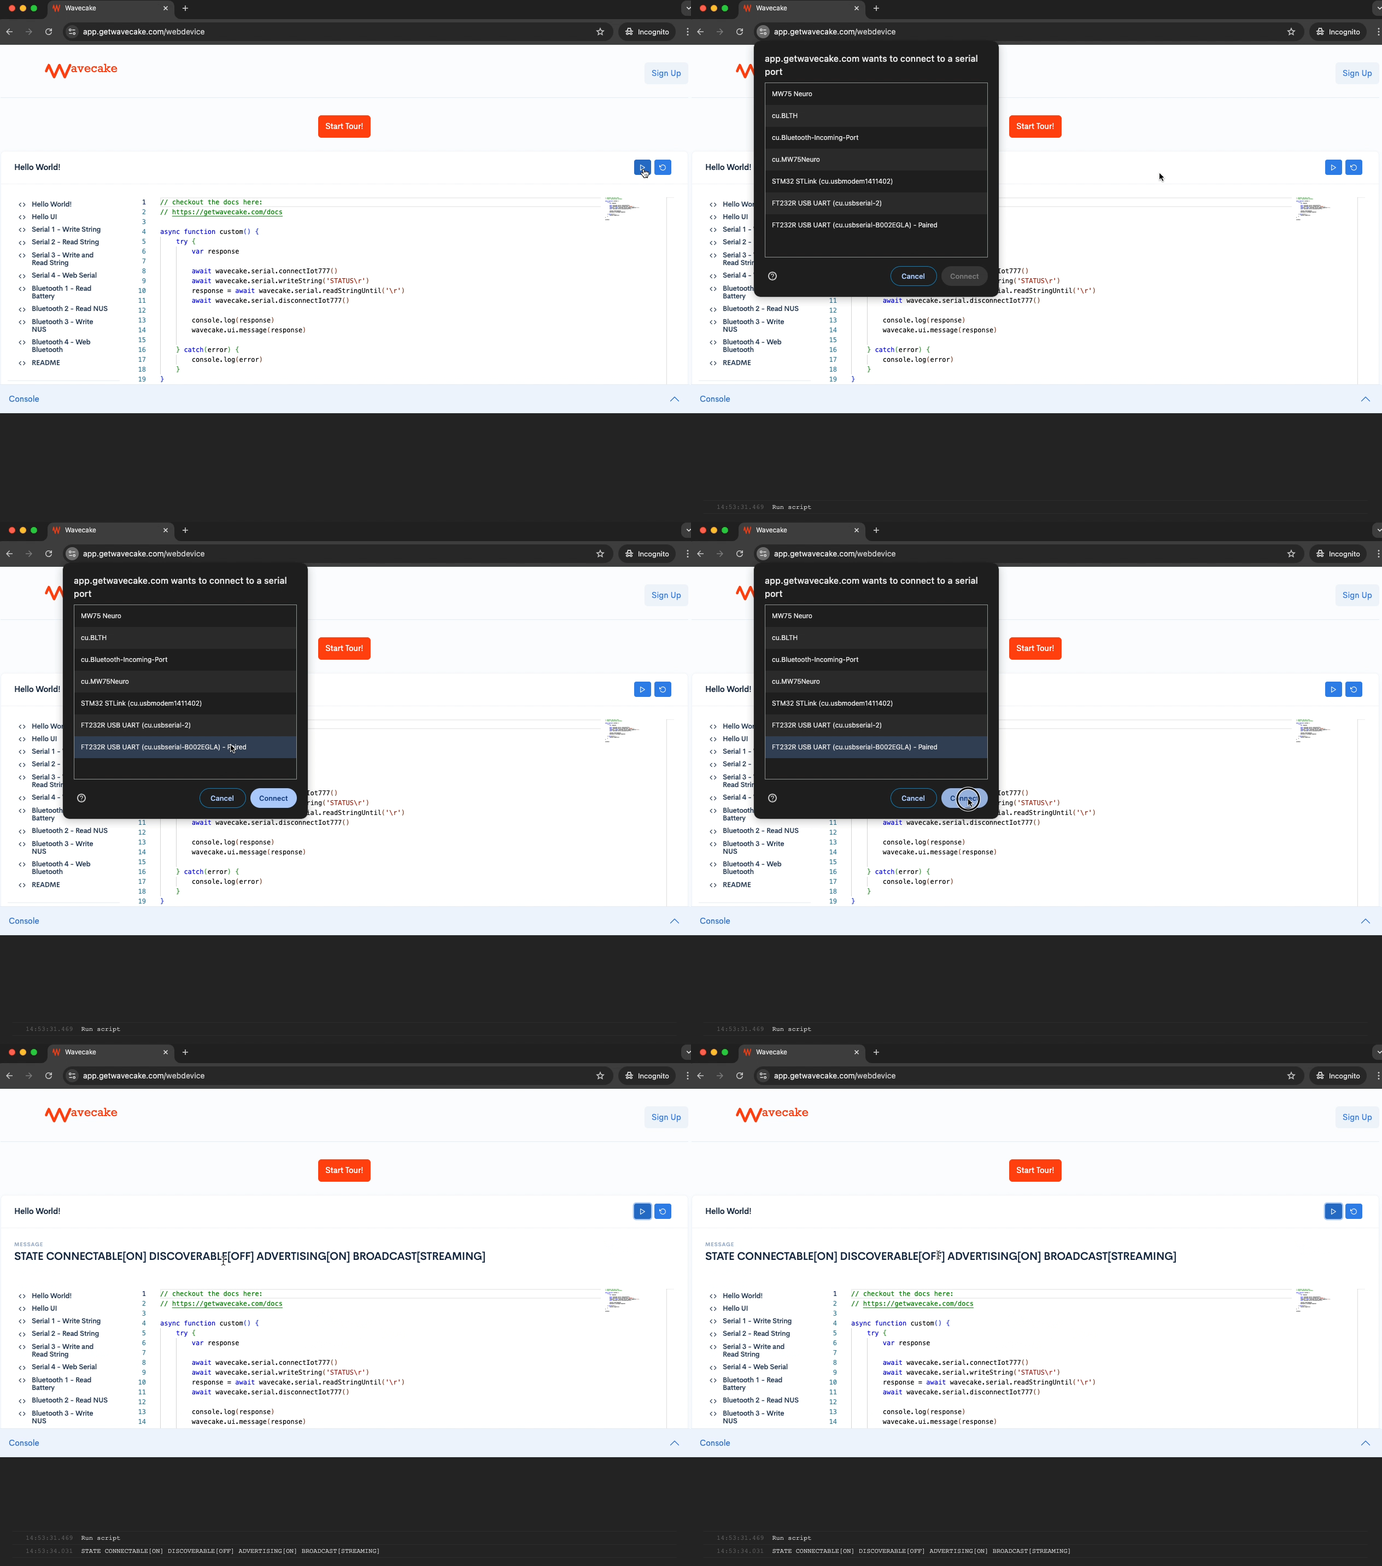
Wavecake also offers some UI features. If you added logs, or if the text is too small for you, you can create a UI message by adding the following code.
wavecake.ui.message(response)Now the returned string will display in large bold letters at the top of the IDE.

Configuration
Next, we'll take a look at the CONFIG command.

The code will look similar, but as you can see in the command manual, the configuration response contains several lines of data to parse. In this case, we can use the following code to read until the terminal receives on OK.
// checkout the docs here:
// https://getwavecake.com/docs

async function custom() {
    try {
        var response

        await wavecake.serial.connect(9600)
        await wavecake.serial.writeString('CONFIG\r')
        response = await wavecake.serial.readStringUntil('OK\r')
        await wavecake.serial.disconnectIot777()

        console.log(response)

    } catch(error) {
        console.log(error)
    }
}

custom()
When you run the script, the terminal will print out a long string. It is human readable, but it would be nice to parse the data and find specifically what you're looking for. Here is some additional code to parse the configuration data and log the UART config to the console.
function parseConfig(config) {
    var settingSplit
    var setting
    var message

    config = config.split('\r')
    for (setting of config) {
        settingSplit = setting.split('=')
        if(settingSplit[0] === 'UART_CONFIG') {
            message = "UART Config is " + settingSplit[1]
            console.log(message)
            wavecake.ui.message(message)
        }
    }
}
If you're an embedded developer (like me), the world of javascript string parsing will be unfamiliar. Here's a page with the reference for other parsing features you can use.
Here's another gif with the above code put together.

Conclusion
In this tutorial we reviewed getting started with the IDC777 DISKIT. The kit requires a UART terminal or a MCU to communicate with it's shell. To take a shortcut and avoid repeating our work, we used Wavecake to generate a script that can be reused.
This also serves as a brief introduction to using the Wavecake serial library. The Wavecake serial library can interact with any serial device. Feel free to stretch this example to fit with any other serial devices scattered around your desk.
If you have any questions at all, reach out to me directly at jackson@wiserdevices.com