Initial setup
The Nordic Zephyr SDK does not offer a lot of clear options for porting the OTA DFU functionality to an existing application. The intent is there, but it's difficult to follow. In this guide, I will outline the steps for incorporating OTA DFU into your application.
In this tutorial, I'm using the nRF5340 DK. After looking through the options, I decided to start with the peripheral heart rate monitor application. Navigate to the location of the Nordic SDK. Then navigate further into the directory to the application, as shown in the picture below.
Now, copy that folder to a new location. I put mine into the black hole of hard drive space known as the Downloads folder.


Now's a good time to mention that I won't be covering the West setup in this guide. If you haven't set it up yet, check out the Nordic tutorial here.
In the next step, I move to VS Code by dragging and dropping the folder into a new VS Code window.

If you have West installed correctly on your computer, simply run the following two commands. Make sure your devkit is plugged into your computer.
west build -b nrf5340dk_nrf5340_cpuapp
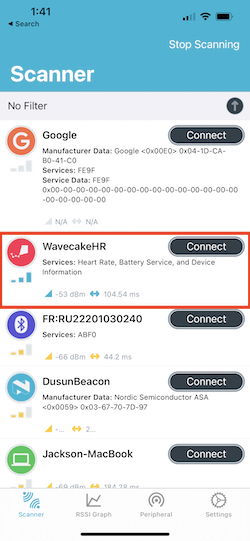
west flashTake a moment to check that you installed the binary correctly. You should be able to see it advertising in Wavecake or your Bluetooth scanner of choice.
Adding DFU
Now, it's time to add the DFU subsystem. I used a sample from the SDK as a reference. You can find it in the file path shown below.

Ultimately, there's two steps to take.
1. Add the proper defines to prj.conf
2. Add initialization code
Copy and paste these defines to your prj.conf. I deleted a few of the unnecessary defines from the smp_svr example. I tried to leave only the configurations that were strictly necessary. For instance, there is a logging module and the littlefs module that the smp_svr example includes for logging the smp details. I thought that seemed a little heavy for this tutorial. In the case that you would find them useful, know that you can find those features in the example and port them.
# Enable mcumgr.
CONFIG_MCUMGR=y

# Some command handlers require a large stack.
CONFIG_SYSTEM_WORKQUEUE_STACK_SIZE=2048

# Ensure an MCUboot-compatible binary is generated.
CONFIG_BOOTLOADER_MCUBOOT=y

# Enable flash operations.
CONFIG_FLASH=y

# Required by the `taskstat` command.
CONFIG_THREAD_MONITOR=y

# Enable statistics and statistic names.
CONFIG_STATS=y
CONFIG_STATS_NAMES=y

# Enable most core commands.
CONFIG_MCUMGR_CMD_IMG_MGMT=y
CONFIG_MCUMGR_CMD_OS_MGMT=y
CONFIG_MCUMGR_CMD_STAT_MGMT=y

# Allow for large Bluetooth data packets.
CONFIG_BT_L2CAP_TX_MTU=252
CONFIG_BT_BUF_ACL_RX_SIZE=256

# Enable the Bluetooth (unauthenticated) and shell mcumgr transports.
CONFIG_MCUMGR_SMP_BT=y
CONFIG_MCUMGR_SMP_BT_AUTHEN=n
CONFIG_MCUMGR_SMP_SHELL=y

# Add 256 bytes to accommodate upload command (lfs_stat overflows)
CONFIG_SYSTEM_WORKQUEUE_STACK_SIZE=2304
It should look like this.

Next, add the initialization code. The mgmt register calls go before the bt_enable. Call smp_bt_register after the bt_enable.
Copy and paste from here.
os_mgmt_register_group();
img_mgmt_register_group();
stat_mgmt_register_group();

err = smp_bt_register();

if (err) {
  printk("SMP BT register failed (err: %d)", err);
}
It should look like this.

To confirm that the device has DFU enabled, use the nRF Connect app. Connect to the device and select the DFU option. You should see that the DFU is permitted.

Generate app_update.bin
Now that DFU is enabled in the firmware, the west build command will generate a binary to be used with the Zephyr DFU.
Make a small change so that you can confirm the DFU succeeded. I opted for changing the advertising name from 'Zephyr Heartrate Sensor' to 'WavecakeHR'. The advertising name in my example exists in the prj.conf file.
Note: Watch out for name length. A long name will cause the device to not work correctly.

Now, run west build again. Notice, I added the -p (pristine) flag to the command. This will make a clean build of the project. It's best not to leave anything up to chance, especially since we're modifying a configuration file and not a C file.
Don't run west flash. We will be updating the firmware over-the-air (OTA) :)
west build -p -b nrf5340dk_nrf5340_cpuappThe file is called app_update.bin. You can find it in the build/zephyr directory.

Using DFU
At this point, you can continue on to use the nRF app to complete the DFU. Alternatively, I'll provide a brief guide to using Wavecake for Nordic DFU.
Navigate to the app and sign up here.
First, make sure that you have the special Bluetooth permission enabled in Chrome. Navigate to chrome://flags and enable 'Use the new permissions backend for Web Bluetooth'

Now, locate your app_update.bin. Follow along with the capture below.
At this point, bring up your preferred BLE scanner to see that the advertising name has changed.
Perfect! Wasn't that fun?
Conclusion
What seemed like a pretty daunting task ended up being pretty simple. The key is taking the right steps. Hopefully, I've made those steps easy enough to follow in this post.
If you have any questions, reach out to info@getwavecake.com